System Specs:
- Stellar Mass: 0.3 Sol Masses
- Stellar Class: M
- Luminosity: N/A Sol
- Planets: 3
- Moons: dozens
- Asteroid Belts: 1
- Asteroids: 0
- Objects: 4
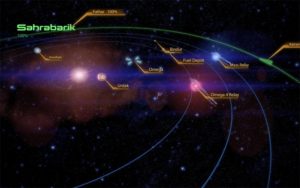
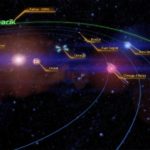
Sahrabarik has a developed infrastructure for supporting its main attraction, Omega, usually run by criminals for criminals. Imorkan is host to numerous refueling and layover stations, while the space around Urdak is often used to conduct intersyndicate warfare. The system is about 12 billion years old, and acts as a gateway system to other systems in the Omega Nebula.
In terms of extractable resources, only Bindur has a rich rating, particularly for platinum.
–
Planets Directory:
- Urdak
- asteroid belt
- Omega (asteroid station/town)
- Imorkan
- fuel depot
- Omega 4 relay (Mass Relay)
- Bindur
- Mass Relay
–
Urdak:
- Orbital Distance: 0.8 AU
- Orbital Period: 1.3 Earth-years
- Keplerian Ratio: 0.303
- Radius: 72,512 km
- Day Length: 19.2 Earth-hours
- Atmospheric Pressure: N/A atm
- Surface Temp: 1,300 °C
- Surface Gravity: N/A g
- Mass: N/A Earth-masses
- Satellites: many
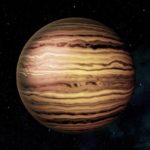
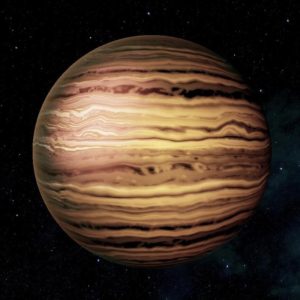
Urdak is a close-orbiting brown dwarf; most red-brown dwarf binary systems have an average separation of 8 AU. The Sahrabarik system is about 12 billion years old and it has long since used up the deuterium used to fuel fusion, so Urdak is not luminous like some brown dwarfs are.
Urdak is a class L brown dwarf with a relatively low temperature of 1,300 degrees Celsius, but its heat and gravity have made it unpopular for development. There are rumors that the heads of several of Omega’s crime syndicates maintain private residences on various moons. Whatever the truth of the matter, battles between syndicate vessels are often observed around the ring plane. News outlets on Omega maintain satellites at Urdak’s Lagrange points for real-time coverage of these battles, which garner high viewer ratings.
–
Omega:
Description
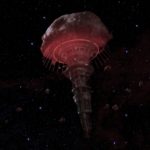
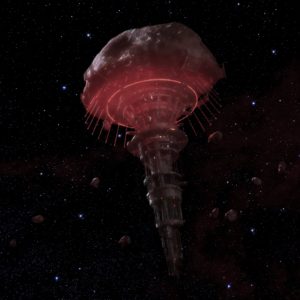
Built in the mined-out husk of a metallic asteroid, Omega has been a haven for criminals, terrorists, and malcontents for thousands of years. At times, the station has lain idle and abandoned for centuries, only to be reactivated by a new group of outlaws seeking a fresh start. The space station’s original elegant design has given way to haphazard expansion by scrabbling factions of every species. There is no central government or unifying authority on Omega, and nobody can recall a time there ever was one.
- Population: 7.8 million
- Orbital Distance: 2.43 AU
- Orbital Period: 6.9 Earth Years
- Total Length: 44.7 Km
Codex Entry
Gnome-mime-sound-openclipart.png Audio: Omega
Originally an asteroid rich in element zero, Omega was briefly mined by the Protheans, who eventually abandoned it due to its thick, impenetrable crust. Thousands of years later, nature did what even the Protheans could not: a collision with another asteroid broke Omega in half, exposing its trove of element zero for easy mining.
A rush ensued as corporations and private individuals tried to strike it rich on Omega, and thieves and outlaws followed in their wake. As space became tight, construction of processing facilities extended vertically from the asteroid, creating Omega’s jellyfish-like silhouette. To prevent future collisions, the station is ringed with enormous mass-effect field generators that redirect incoming debris.
Today, Omega is a major hub of narcotics, weapons, and eezo trafficking without even a pretense of civilian government or military control. Only mercenary groups have been able to instill a limited order; the most ruthless is an asari syndicate run by the notorious Aria T’Loak.
History
Omega’s eezo processing plants
Omega is described as “the Terminus Systems’ dark, twisted counterpart to the Citadel.” It is a huge mining station built from the remains of a massive, irregularly shaped asteroid with twisting streets populated with homes, shops and warehouses. Omega’s inhabitants are usually lawless. Territory is controlled by the strongest faction in that area and frequently changes hands, often after brutal violence. The station’s current “de facto” ruler is Aria T’Loak. As of 2185, Omega has a population of 7.8 million people, composed of various different species. The station’s major export is element zero.[1]
The earliest known ruler of Omega was a turian; he controlled the station until he was killed by a krogan crime-lord who ate his heart and wore his skull on his armor. The krogan reigned over Omega undisputed for a time until around the 1980s CE, when Aria T’Loak, once one of his most trusted lieutenants, defeated him in single combat and usurped him.
The heavy-metal-rich core of the original asteroid was mined until the asteroid was almost completely hollow, providing the initial resources used to construct Omega’s buildings and facilities. Over the years, these have been expanded until they completely cover every exposed inch of its surface, making Omega a bizarre mishmash of architecture and technology. The station is home to dozens of species, including batarians, vorcha, and Lystheni salarians, as well as many other species not welcome in Citadel space.
While humans refer to it as Omega, the asari name for it translates as “the heart of evil”, the salarian name as “the place of secrets”, the turian name as “the world without law”, and the krogan name it as the “land of opportunity”, clearly reflecting their cultural attitudes towards the society within Omega.
AscenSpoilerTagPic1.png “Salvation comes with a cost.” — Spoilers for Mass Effect: Ascension follow. AscenSpoilerTagPic1.png
Mass Effect: Ascension
Cerberus controls a large warehouse and smuggling operation at Omega in 2183, led by Pel, a Cerberus operative. Pel finally betrays Cerberus, leading to the deaths of all of his team, and there has been no word about the warehouse since.
“I said get back!” — Spoilers for Mass Effect: Redemption follow.
Mass Effect: Redemption
Liara T’Soni hitches a ride to Omega on a batarian freighter in order to meet an informant with news of the then-missing Commander Shepard. Liara learns from Aria that Shepard’s body is being taken to the station’s lower levels, at an old mining processing plant, as part of a transaction between the Blue Suns and the Shadow Broker. A brief scuffle at the area ensues over possession of Shepard’s body, resulting in explosions, moderate fire damage, and a lot of mercenary casualties.
“The chances of surviving are… slim.” — Spoilers for Mass Effect 2 follow.
Mass Effect 2
Massive protrusions from the asteroid surface of Omega define its skyline
In 2185, Commander Shepard travels to Omega to recruit Mordin Solus, “Archangel”, and (optionally) Zaeed Massani.
At the time, a plague is ravaging Omega’s populace, killing dozens of people from various races but mysteriously sparing humans. Mordin Solus, a salarian scientist and former STG operative, runs a clinic in one of Omega’s slums. The plague is revealed to have been caused by the vorcha, who aligned with the Collectors in order to take over the station. Using a cure for the plague developed by Mordin, Shepard stops the outbreak and foils the vorcha scheme.
Elsewhere, Archangel is a vigilante who has been cornered at his base by Omega’s three dominant mercenary factions: the Blue Suns, Eclipse, and Blood Pack. Shepard signs on with the Blue Suns as a freelancer in order to help the besieged Archangel. After taking a Blue Suns advance force by surprise and discovering Archangel is actually Garrus Vakarian, Shepard and Garrus fight off the last waves of the merc attack and escape. News reports after the fact indicate that the merc groups covered up their defeat, and claim that Archangel had been killed.
During the course of the Archangel mission, Shepard can learn that the three merc groups planned to try and topple Aria’s regime after getting rid of Archangel. This information can be passed on to Aria, who can be found on a balcony overlooking Afterlife.
“Your understanding is limited…” — Spoilers for Mass Effect: Retribution follow.
Mass Effect: Retribution
In 2186, Paul Grayson lives on Omega and works for Aria T’Loak as an enforcer under the alias “Paul Johnson”. Grayson gradually gains Aria’s trust through the efforts of her daughter, Liselle, who has become Grayson’s lover. Grayson, Liselle, and more of Aria’s enforcers ambush a group of turians belonging to the growing Talons mercenary group and take red sand which the Talons had been smuggling on the side.
Later, after being implanted with Reaper technology, Grayson returns to Omega to meet with Kahlee Sanders, which turns out to be a trap ultimately set by the Illusive Man and permitted by Aria, who thinks Grayson killed Liselle and wants revenge. Grayson is wounded in the attack but manages to escape Omega.
“Where the hell are these things coming from?” — Spoilers for Mass Effect: Invasion follow.
Mass Effect: Invasion
Omega comes under attack as Reaper creatures called Adjutants break loose from Cerberus’s research bases beyond the Omega 4 Relay and invade the station. A Cerberus fleet led by General Oleg Petrovsky and Colonel Raymond Ashe arrives and helps eliminate the Adjutants. The Adjutant attack turns out to be only a prelude to an attempt by Cerberus to conquer the station and secure exclusive access to the Omega 4 Relay and its treasure trove of Reaper technology. Aria unites Omega’s warring gangs to fight against the Cerberus occupation force, but General Petrovsky outsmarts her by taking the entire station hostage and threatening to destroy it level-by-level. Aria surrenders and accepts exile. Cerberus proceeds to take control of Omega, furthering the Illusive Man’s plans to counter the Reapers.
“There won’t be an Earth left to save…” — Spoilers for Mass Effect 3 follow.
Mass Effect 3: Omega
Omega’s outer defenses on steroids
The occupation of Omega gave Cerberus a huge strategic advantage during the Reaper invasion of 2186, bolstering their mobility throughout the galaxy. Cerberus would overuse the mining facilities of Omega, pushing the mining equipment of the asteroid to its limits. Cerberus had difficulties maintaining the occupation, however. The Talons gang led by Nyreen Kandros is one of those groups still able to resist the occupation. In order to contain the civilian population, General Oleg Petrovsky erected large energy-intensive force fields throughout the station along with a large number of mechs and troops to maintain order.
Cerberus also conducted experiments with the Reaper-based adjutants in Omega. Initially this proved to be disaster. Large sections of Omega had to be shut down and sealed at a great cost of lives to contain outbreaks of uncontrolled Adjutants. Further experimentation would give Cerberus a full control of these creatures.
Aria begins her campaign to liberate Omega from Cerberus, having enlisted Commander Shepard in the process. Traveling aboard a captured Cerberus cruiser in order to infiltrate the Cerberus fleet surrounding the station, Aria opens her attack with a crippling blow to the fleet’s flagship as her own fleet charges in via mass relay. The tables are soon turned, however, as Petrovsky reveals Omega’s upgraded defenses by proceeding to inflict heavy damage on her fleet.
The initial invasion force lands on the station in escape pods. Aria and Shepard first disable Omega’s defenses in order to give the invading fleet a chance. Later, with the help of Nyreen Kandros, they fight their way to Aria’s Bunker on Omega’s D-Deck, where Aria decides that in order to get to Petrovsky’s command center in Afterlife, she needs to rally the Talons gang to her cause to supplement her ground forces, and disable the force fields that Cerberus has set up.
Omega Reactor C – provides power to the Cerberus force fields
Cerberus is siphoning power for the force fields from one of Omega’s main reactors deep within its mines. As access to it is mostly cut off by the force fields, Aria devises a plan to go through a powered-down eezo processing plant. Navigating the mines, Aria notices the machinery’s overworked condition and estimates a month before they give out if the current trend continues.
Aria and company eventually reach an elevator to the reactor’s back door, although General Petrovsky traps the squad in more force fields in anticipation of the move. Aria is not to be outdone, and forcibly opens a hole in the barrier for Shepard to pass through and disable the reactor.
Petrovsky dishes out another difficult dilemma at the turn of events: immediately shutting down the reactor will cause loss of life support in a lot of Omega’s areas, which translates to loss of civilian lives. Taking the time to reroute the power increases the chance of Aria and Nyreen dying as they’re still holding their own against endless waves of mechs in the trap. Regardless of choice Shepard disables the reactor and ends the forced internal blockades.
The Mad Prophet rallies the denizens in the closing stages of the war for Omega
With the Talons recruited, the populace incited, and the force fields down, the true war for Omega begins as the civilians revolt against Cerberus. Aria and Shepard prevent Cerberus from destroying Omega by blowing up the station’s central support column, then join in the offensive to Afterlife from the Gozu District. Nyreen, who had been leading a separate assault with her Talons, sacrifices herself to kill a group of rogue Adjutants. Enraged at Nyreen’s loss, Aria charges into Afterlife ahead of Shepard.
Afterlife has been repurposed by Petrovsky in the course of making it his base of operations: the General traps Aria in a stasis field at the center of the establishment, powered by generators positioned at the corners. Shepard breaks her out and defeats all the Cerberus forces in Afterlife.
Defeated, Petrovsky surrenders himself and orders his troops to stand down, but Aria and Shepard decide whether he should be spared or executed on the spot. With Omega hers to rule once more, Aria announces its liberation to the citizenry, and vows to never lose the station again.
Districts
- Omega is divided into several districts. Known districts include:
- Carrd District – A district controlled by the elcor. An ongoing war between volus and batarians in a neighboring district in 2183 forced merchants and customers alike to move their business over to the relative stability of this district.
- Doru District – A district located near several vital Omega utility systems, including a water treatment facility, the main ventilation system, and the station’s central support column. Cerberus fortified the area during their occupation in 2186.
- Fumi District – A district the Talons raided to free civilians during the Cerberus occupation of Omega in 2186.[2][3]
- Gozu District – A residential area in the lower levels of Omega accessible by shuttle, notable for being the location of the
- Omega Clinic. Once policed by the Blue Suns, the district fell into chaos after being quarantined to prevent the spread of an unknown plague in 2185.
- Kenzo District – A district where Garm and the Blood Pack were allegedly carrying out a large gun running operation in 2185. This turned out to be a ruse set up by Sidonis for Archangel so that Omega’s gangs could attack Archangel’s hideout.
- Kima District – Another residential area that borders Gozu District. The vigilante Archangel and his team occupied a building in Kima District in 2185 where they were cornered by the Blue Suns, Eclipse, and Blood Pack.
- Tuhi District – A commercial area filled with shops and businesses, including Tuhi District Storage, that is located near Aria’s Bunker. Cerberus fortified this area during their occupation in 2186.
- Zeta District – A district where Cerberus deployed Rampart Mechs during their occupation in 2186.[2][3]
Missions
Mass Effect 2
- Mission: Dossier: Archangel
- Mission: Dossier: The Professor
- Mission: Dossier: The Veteran
- Mission: Omega: Aria T’Loak
- Mission: Samara: The Ardat-Yakshi
Mass Effect 3
- Mission: Omega: Aria T’Loak (Mass Effect 3)
- Mission: Omega: Assist the Hacker
- Mission: Omega: Assist the Mechanic
- Mission: Omega: Assist Harrot
Assignments
- Assignment: Omega: Archangel: Datapad Recovered
- Assignment: Omega: Batarian Bartender
- Assignment: Omega: Packages for Ish
- Assignment: Omega: Struggling Quarian
- Assignment: Omega: The Patriarch
- Assignment: Omega: The Professor: Missing Assistant
Trivia
Omega Logo
Omega (Ω) is the 24th and last letter of the Greek alphabet.
According to the Collector’s Edition Concept art book, the team based the design on a mushroom cloud.
According to Mass Effect: Incursion, in 2183 there were 853,245 humans living on Omega.
Omega’s overall atmosphere and style is inspired by the film Blade Runner. Similarities include electrical interference in signs, flames atop buildings, and poor environmental conditions.[4]
According to writer Jay Turner, BioWare also pulled inspiration from Star Wars’ Mos Eisley cantina for Omega’s vibe, as a means to show the criminal side of the Mass Effect universe.[5]
Omega is a mission location in the N7 HQ Galaxy at War mini-game for Mass Effect 3.
–
Imorkan:
- Orbital Distance: 3.4 AU
- Orbital Period: 11.5 Earth-years
- Keplerian Ratio: 0.297
- Radius: 53,491 km
- Day Length: 18.7 Earth-hours
- Atmospheric Pressure: N/A atm
- Surface Temp: N/A °C
- Surface Gravity: N/A g
- Mass: N/A Earth-masses
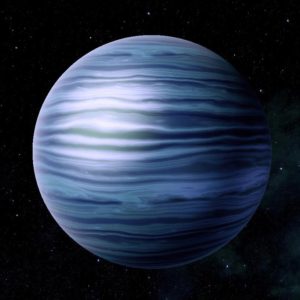
A standard methane-ammonia gas giant, Imorkan is the main source of helium-3 fuel for ships coming to or from Omega. Most of its fueling stations are run by criminal cartels, who engage in cutthroat (sometimes literally) pricing wars. Imorkan is also widely known for its layover stations, where pirates in a hurry can find fuel, ammunition, intoxicants, gambling, and sexual companionship at any hour.
–
Omega 4 Relay:
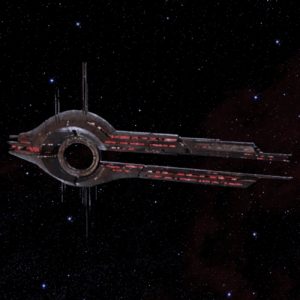
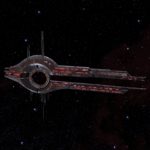
The Omega 4 relay is surrounded by hazard beacons and automated warnings. Over the last thousand years, many ships have attempted to pass through it, but none have returned. The only ones to pass freely back and forth through the relay are the mysterious Collectors.
There are many theories why ships never return from Omega 4. Some say there is a black hole at the far end; others (mostly the impoverished underclass of Omega) believe there is some form of earthly paradise. Most, however, simply think that the Collectors capture or destroy those passing through the relay.
“The chances of surviving are… slim.” — Spoilers for Mass Effect 2 follow.
Mass Effect 2
The immediate vicinity at the other end of the relay
The Omega 4 Relay actually leads to the galactic core, where the Collector base resides on the edge of a black hole. Standard relay transit protocols often result in a drift of several thousand kilometers from the intended position, but this is fatal in the galactic core. As a result, the area is filled with debris from the many ships which had used the relay without a Reaper IFF and hence did not survive. The Reaper IFF triggers advanced safety protocols in the Omega 4 Relay, which would ensure a ship survived coming into close range of the black hole.
Trivia
Omega is the final letter in the Greek alphabet, and is often associated with ending or death.
The number 4 is also associated with death in much of east Asia. (See “Tetraphobia” on Wikipedia.)
The Omega 4 Relay is the only known mass relay to glow red. All others glow blue.
If Shepard survives the suicide mission, reports of the Omega 4 Relay’s recent use has Alliance officials extremely concerned.
–
Bindur:

- Orbital Distance: 6.12 AU
- Orbital Period: 27.7 Earth-years
- Keplerian Ratio: 0.299
- Radius: 4,907 km
- Day Length: 53.3 Earth-hours
- Atmospheric Pressure: Trace atm
- Surface Temp: −224 °C
- Surface Gravity: 0.55 g
- Mass: 0.323 Earth-masses
If it were closer to Sahrabarik, Bindur would have an atmosphere of carbon dioxide and ethane. In the deep cold of the outer solar system, however, both elements have long since frozen to the ground.
–
–
video
